Paving a driveway DIY-style is an adventure that blends the thrill of personal accomplishment with the practical benefits of cost savings. It’s a standout project for those who love to roll up their sleeves and dive into hands-on work. This initiative not only allows you to save considerably by bypassing professional fees but also grants you the freedom to tailor your home’s entrance according to your preferences. This guide will walk you through each step of the process, from planning and preparation to installation and maintenance, ensuring you’re well-equipped to take on this rewarding project.
Planning: Laying the Groundwork
Planning a DIY paver driveway project requires careful consideration and thorough preparation. This phase is the foundation upon which the success of your endeavor rests. It involves several crucial steps, each ensuring that your driveway is not only aesthetically pleasing but also functional and compliant with local regulations.
Site Assessment
The first step in the planning process involves a detailed Site Assessment. This encompasses evaluating the driveway size and shape and drainage considerations.
- Driveway Size And Shape – The size of your driveway dictates the amount of materials needed, while the shape influences the design and layout. It’s imperative to measure the area accurately, considering how the driveway’s configuration can enhance your home’s curb appeal. A driveway should not only be functional but also complement your home’s architecture and landscaping.
- Drainage Considerations – An effective drainage system is crucial for the longevity of your driveway. Poor drainage can lead to water accumulation, which might cause the pavers to shift or the driveway to crack. Assessing the slope and planning for proper water runoff are essential steps in avoiding such issues. This might involve installing drainage pipes or grading the driveway area to ensure water flows away from the surface efficiently.
Permitting
Before any physical work begins, addressing permitting requirements is essential.
- Local Regulations – Different localities have various local regulations concerning driveway paving. These regulations may dictate the materials you can use, the maximum size of the driveway, and specific drainage solutions. Obtaining the necessary permits ensures that your project is legal and compliant, saving you from potential fines and the need to redo the work.
Fortunately, Coastal Driveway Pavers offers assistance in navigating these local regulations and securing the necessary permits for your project. Their expertise can streamline the process, making sure that your project adheres to all local guidelines and requirements.
- Utility Line Locating is a critical safety measure. Before you start excavating, it’s vital to identify and mark any utility lines that run beneath the proposed driveway area. Accidentally cutting into a water pipe or electrical line can lead to costly repairs and dangerous situations. Most localities offer a free service to mark these lines, ensuring your project does not disrupt essential services.
Essential Tools and Materials for Paving a Driveway
Starting a DIY paver driveway project brings excitement and a bit of challenge, but having the right Tools and Materials ensures a smoother process and a successful outcome. This section dives into the essential tools for excavation and paving, as well as the key materials needed for a durable and appealing driveway.
Excavation Tools
The initial step towards laying your new driveway is preparing the site, which involves using the proper Excavation Tools. A Shovel and Pickaxe are indispensable for this task. They help in removing the old driveway surface and digging up the soil to the required depth, ensuring the ground is ready for the new materials. This step is crucial for preparing a solid foundation, which affects the durability and stability of your driveway.
Paving Tools
After preparing the land, you’ll need Paving Tools. A tamper is essential for compacting the base material, creating a stable and level foundation that will support the pavers. For cutting pavers to match your design, a paver saw is necessary. Whether it’s making adjustments for a perfect fit or creating a unique pattern, the paver saw allows for precise cuts, ensuring your design comes to life exactly as envisioned.
Materials
Selecting the correct materials is critical for the project’s success. The base material, typically gravel, is chosen for its ability to provide excellent drainage and a firm foundation for the pavers. When it comes to the pavers themselves, the options vary from brick paver driveways to concrete and natural stone, each offering different looks, durability, and price points. The choice of pavers not only affects the driveway’s functionality and longevity but also its aesthetic appeal.
Preparation: The Blueprint for a Perfect Paver Driveway
Preparation is the phase where your DIY paver driveway project begins to take shape, quite literally. This crucial stage involves Marking Out the project area and Excavating to meet specific depth and slope requirements. Proper preparation sets the stage for a smooth installation process and guarantees the longevity and functionality of your driveway.
Marking Out
The first step in the preparation phase is to mark out the boundaries of your driveway. Using String Lines & Spray Paint allow for precise delineation of the project area, ensuring that your driveway has clear, straight edges and matches the vision in your plan. This accuracy is vital for both the aesthetic appeal and the structural integrity of the finished driveway. The string lines act as guides for the excavation and paver installation, while the spray paint can highlight areas that need special attention or adjustments during the process.
Excavation
With the project area clearly marked, the next step is excavation. This involves digging to the correct depth requirements and creating a slope for efficient drainage. Achieving the right depth is essential for laying a sturdy foundation that can support the weight of vehicles. Typically, this includes removing the topsoil and any debris to reach a stable soil layer. Additionally, incorporating a slight slope away from your home ensures that water runoff is properly managed, preventing water from pooling on the surface or near the foundation of your house. Proper drainage is key to preventing premature deterioration of the pavers and maintaining the integrity of your driveway over time.
Base Installation: Laying a Solid Foundation
When it comes to creating a long-lasting paver driveway, the base installation step is where the magic happens. This stage involves carefully selecting and applying the right base material and ensuring its compaction is executed flawlessly. The base is the bedrock of your driveway, providing stability, preventing weed growth, and ensuring the durability of the entire structure.
Base Material
Choosing the appropriate base material is pivotal. Gravel, with its excellent drainage properties, and geotextile fabric, a weed barrier that also helps to stabilize the gravel, are often used together to form a robust foundation. The gravel acts as a solid, yet flexible layer, accommodating the pavers above and allowing water to drain away efficiently. Meanwhile, the geotextile fabric prevents the mixing of the gravel with the underlying soil, maintaining the integrity of the base and ensuring that weeds cannot find their way through to the surface. This combination not only supports the pavers but also contributes to the longevity of the driveway by preventing shifting and settling that can lead to uneven surfaces.
Compaction
Once the base materials are laid, compaction comes into play. Using a plate compactor for larger areas and a hand tamper for smaller, hard-to-reach spots, the gravel base is compacted to create an even, stable foundation. This process is critical for eliminating air gaps in the base material, which, if left unaddressed, could lead to settling over time under the weight of vehicles. A well-compacted base ensures a level surface that stands up to the test of time and use. It’s this solid foundation that supports the pavers above, allowing them to bear heavy loads without shifting or cracking.
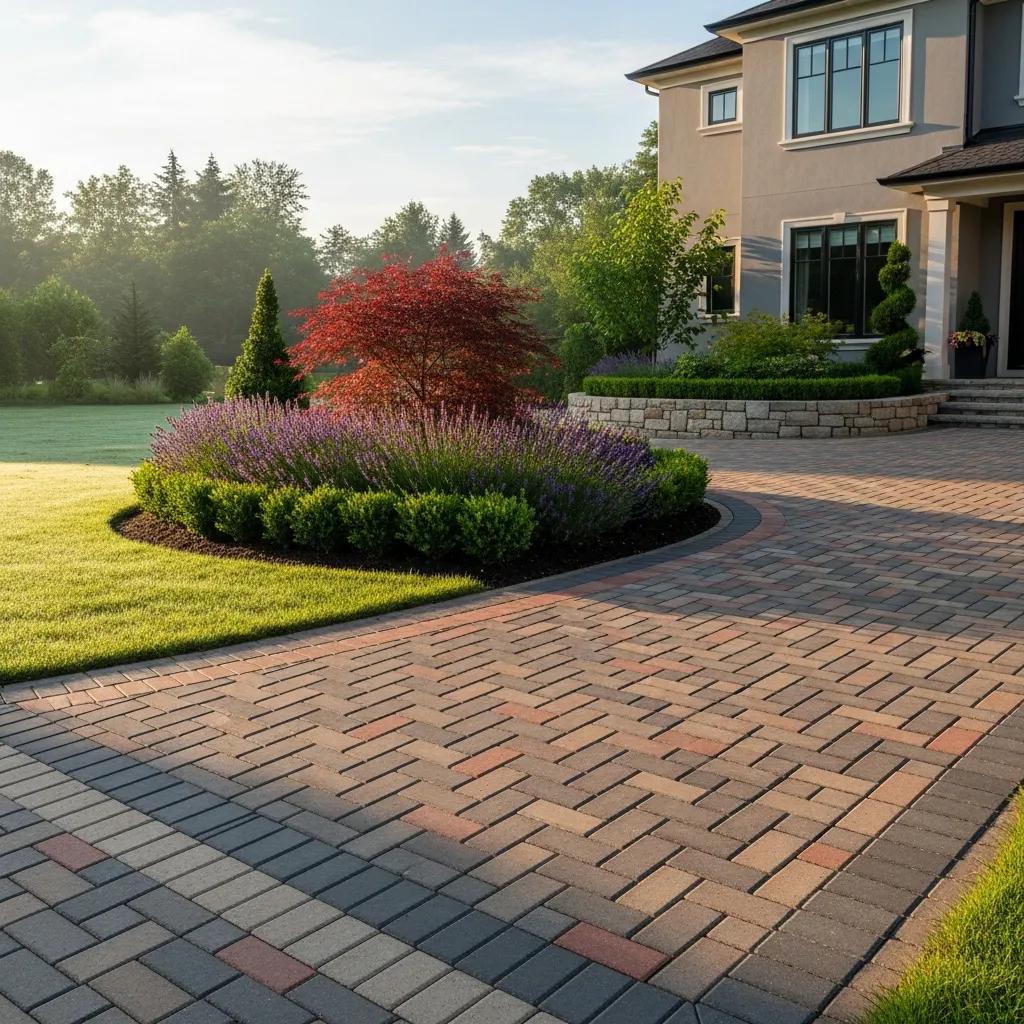
Paver Installation: Perfecting Your Pathway
The Paver Installation process is where your driveway starts to visually come together, transforming from a well-prepared base into a beautifully paved pathway. This step involves critical decisions and meticulous techniques, from Pattern Selection to the precise Cutting and Installation of the pavers. Each aspect plays a crucial role in both the driveway’s appearance and its structural integrity.
Pattern Selection
Choosing the right pattern for your driveway pavers is not just about aesthetics; it significantly impacts the stability and durability of the paved surface. The Running Bond and Herringbone patterns are popular choices that combine elegance with strength. The Running Bond pattern, characterized by its brick-like arrangement, provides a classic look and enhances the linear appearance of the driveway. On the other hand, the Herringbone pattern offers exceptional interlock strength, making it ideal for areas that endure heavy vehicle traffic. This pattern’s angular arrangement effectively distributes weight and resists movement, ensuring a longer-lasting surface.
Cutting
Accurate cutting of the pavers is necessary to fit the edges of the driveway and navigate around any obstacles. Tools such as a Paver Saw and Chisel are indispensable for this task. The paver saw allows for precise cuts, ensuring that each piece fits perfectly within the chosen pattern, while the chisel can be used for finer adjustments or to create custom shapes. This attention to detail during the cutting process ensures a professional-looking finish and contributes to the overall cohesiveness of the paver driveway designs.
Installation
The actual Installation begins at the edge of the driveway and proceeds inward. Starting at the edge ensures that the pavers are laid out in a straight line, providing a clean and tidy appearance. Proper technique involves laying the pavers close together to Interlock them, which adds to the driveway’s stability. This method helps distribute weight evenly across the surface, reducing the likelihood of pavers shifting over time. Additionally, a tight interlock between pavers prevents weed growth and debris accumulation in the joints, maintaining a neat appearance with minimal maintenance.
Jointing and Sealing: Securing and Beautifying Your Driveway
After meticulously laying the pavers for your driveway, the jointing and sealing steps are what truly finish the project, ensuring the longevity and beauty of your work. These processes are crucial for locking the pavers in place, preventing weed growth, enhancing the driveway’s color, and protecting it from stains. This phase encapsulates both the functional and aesthetic culmination of your paving efforts.
Jointing Sand
The application of jointing sand plays a pivotal role in the integrity and appearance of your driveway, especially after you install a paver driveway. This essential step ensures the pavers are firmly locked together, enhancing the driveway’s durability and aesthetic appeal. When it comes to selecting the right type of jointing sand, the choice between polymeric sand and regular sand hinges on the driveway’s specific requirements. Polymeric sand is celebrated for its cohesive properties that activate upon contact with water, creating a strong bond that reduces paver shifting and deters weed growth in the joints. On the other hand, regular sand might be easier to apply and more cost-effective upfront but could necessitate more frequent maintenance to preserve the driveway’s structural integrity. Employing jointing sand to fill the gaps between pavers not only fortifies the installation but also elevates the driveway’s overall finish, resulting in a smooth and refined surface.
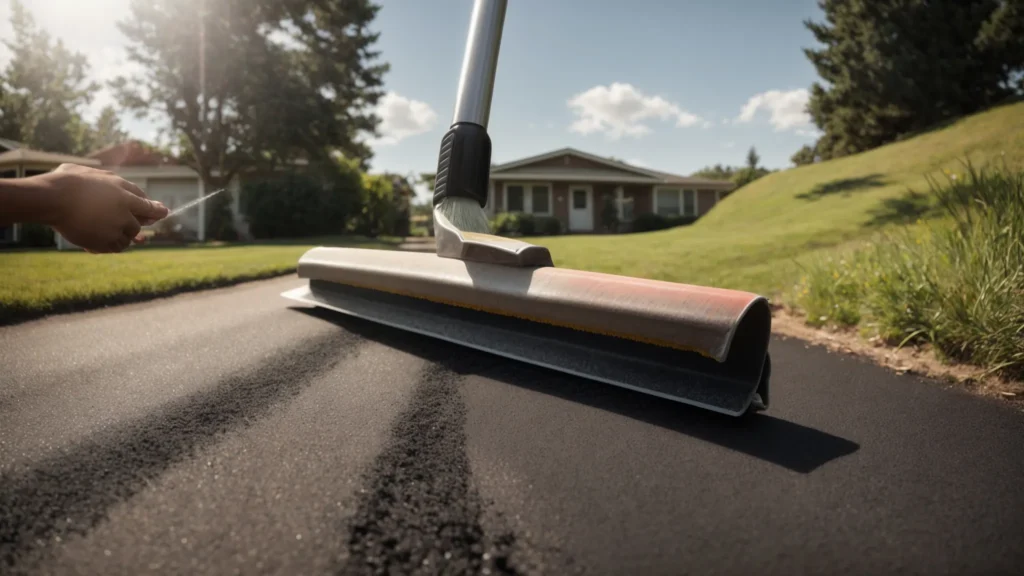
Sealing
Following jointing, paver sealing your driveway is the next step in preserving its appearance and functionality. Sealer application involves covering the paver surface with a protective layer that not only enhances its color but also shields it from stains, UV damage, and water penetration. The choice of sealer can range from matte to glossy finishes, allowing for customization based on aesthetic preference. Curing time is essential to consider, as it dictates when the driveway will be ready for use. Properly applied sealer not only extends the life of your driveway but also makes maintenance easier, ensuring that it remains an attractive feature of your home for years to come.
Maintenance: Maintenance Tips for Your Paver Driveway
Maintaining your paver driveway is key to preserving its beauty and extending its lifespan. Proper Maintenance not only keeps your driveway looking its best but also prevents minor issues from escalating into costly repairs. This involves routine Regular Cleaning and timely Repair of any damage. By adhering to a few simple maintenance practices, you can ensure that your driveway remains a durable and attractive entrance to your home for years to come.
Regular Cleaning
Regular cleaning, including sweeping & pressure washing, plays a crucial role in driveway upkeep. Sweeping is a simple yet effective way to remove debris, leaves, and dirt that can accumulate on the surface. This not only keeps the driveway looking neat but also prevents the materials from getting between the pavers and causing displacement or growth of weeds. For a deeper clean, pressure washing can remove tough stains, moss, and algae that might have taken hold. However, it’s important to use the right pressure setting to avoid dislodging the jointing sand or damaging the pavers.
Repair
Over time, your driveway may experience wear and tear, leading to replacing damaged pavers & re leveling sunken areas. Damaged pavers can become trip hazards and detract from the overall appearance of your driveway. Fortunately, one of the advantages of paver driveways is that individual pavers can be replaced without having to redo the entire surface. Similarly, sunken areas can be re-leveled by adjusting the base material underneath. Addressing these issues promptly can prevent them from worsening, saving you time and money in the long run.
Cost Considerations: Navigating the Costs of a Paver Driveway
When planning paver driveways, understanding the cost considerations involved is crucial for making informed decisions that align with your budget and expectations. Whether you’re leaning towards a DIY approach or contemplating hiring professionals, several factors come into play, including the costs of materials, labor, and potential additional expenses. By carefully evaluating these aspects, you can ensure that your driveway project is both affordable and successful.
DIY vs. Professional
Opting for a DIY approach can lead to significant savings on labor costs, particularly for those with the necessary skills and tools. Tackling a paver driveway project on your own not only helps save money but also provides a rewarding experience. It requires a considerable time commitment and a certain level of skill. For those who might find the project overwhelming or lack the specific equipment, hiring professionals could be a more feasible option. Though more costly in terms of labor, it guarantees the quality of work, which is vital for such a prominent aspect of your home. To put it into perspective, while professional installation costs can vary widely based on location and complexity, DIY efforts could potentially save you 30% to 50%, depending on these and other factors.
Material Costs
The selection of pavers significantly impacts the material costs of your driveway project. Choices range from concrete and brick to natural stone, each bringing its own price tag and aesthetic appeal. Concrete pavers are generally the most cost-effective option, with prices that can start as low as $1 per square foot. On the other hand, natural stone pavers, which offer unique looks and enhanced durability, may cost between $10 to $30 per square foot. The total area of your driveway and the complexity of the design you choose will also affect the amount of material needed, thus influencing the overall cost. It’s wise to consider the initial cost against the long-term value of the materials, taking into account aspects such as longevity and maintenance needs.
Labor Costs
Even in a DIY paver driveway project, you might face labor costs for tasks beyond your skill set or those requiring special tools, like excavation or intricate patterning. Renting equipment or hiring experts for specific jobs will impact your budget. Despite potential savings from handling most tasks yourself, remember to value your time. Planning your budget means balancing your wishes with realities and expenses, with professional installations varying from $8 to $20 per square foot. These considerations are key to making informed decisions that blend aesthetic appeal with affordability.
Conclusion
Initiating a DIY project to pave a driveway can significantly elevate a home’s curb appeal and value. With meticulous planning, appropriate tools, and the right materials, one can achieve a driveway that is not only robust but also visually appealing. This endeavor, while rewarding, requires a considerable amount of effort and dedication. It brings a sense of accomplishment and pride as one sees their vision materialize. However, for those seeking a guarantee of quality and durability, or perhaps facing the complexity of the task at hand, contacting a professional contractor like Coastal Driveway Pavers becomes an invaluable step.
Coastal Driveway Pavers provides professional paver driveway installation services, supplying premium materials tailored to each homeowner’s specific needs. Whether you’re at the concept stage or ready for installation, their team is prepared to offer the support needed to bring your project to completion. Contact them today!
Frequently Asked Questions
Maintaining a paver driveway involves regular sweeping to remove debris, periodic rinsing with a hose or pressure washer to keep it clean, replacing jointing sand as needed, and sealing the pavers every few years to protect against stains and weathering. Promptly addressing any weeds that appear between pavers and repairing displaced or damaged pavers will also help maintain the driveway’s appearance and longevity.

Written By: