1. Preparing for the Paving Project
Before starting any work, meticulous planning is crucial. No successful project ever began without clear and detailed preparation. You’ll need to:- take precise measurements
- determine the necessary materials and tools
- and outline the location of your driveway
- Pavers
- Sand
- Gravel
- Geotextile fabric
- Edge restraints
- Shovels
- Rakes
- Compactor
- Level
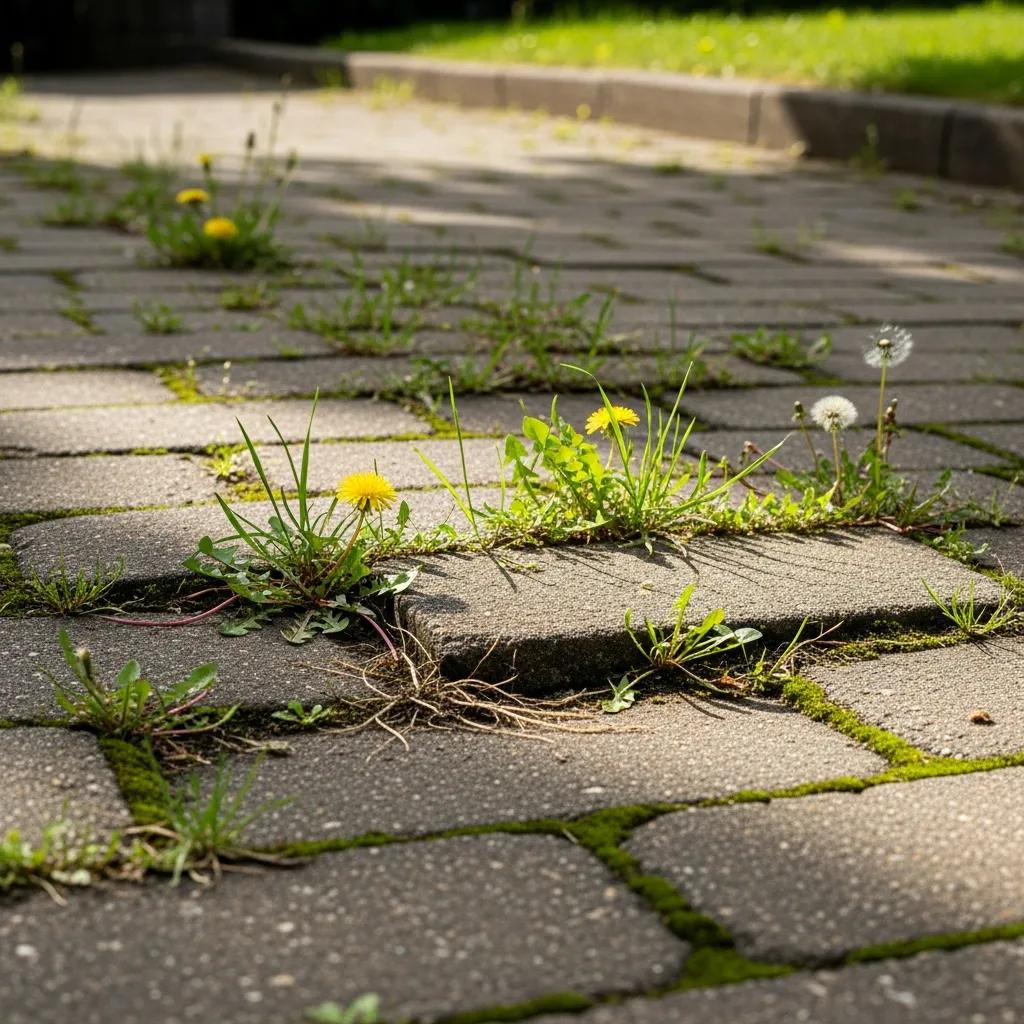
2. Removing the Old Surface
Before you begin the removal process, inspect your driveway for any plants or outdoor furniture that might obstruct your work. A clear, open space to work in will ensure no obstacles as you move forward with this project.When it’s time to demolish the existing surface, the tools you need will depend on the driveway’s composition. For concrete or asphalt driveways, a jackhammer or concrete saw may be useful for breaking up and removing the old materials. Safety is paramount during this heavy-duty work, so ensure you wear protective gear such as goggles, gloves, and a mask to shield yourself from debris and dust.Proper disposal of the old materials is essential, following local waste disposal regulations. This not only maintains environmental responsibility but also ensures a clean and safe work area.This step lays the groundwork for your new driveway. By ensuring proper disposal of old materials, you’re not only abiding by local laws but also contributing to environmental sustainability.Now that we’ve successfully cleared the area and safely removed the old surface, it’s time to move forward with laying down the groundwork for your new driveway.3. Excavating and Compacting the Base
Excavating and compacting the base makes up a foundational step in creating a sturdy, long-lasting driveway. Let’s break down each part of this process to ensure you have a strong and stable foundation for your new driveway.Excavation: Getting Down to Business
Before laying the first paver, you need to make sure the ground is ready. Using a shovel or an excavator, remove the soil to the required depth—usually around 8-10 inches to accommodate the paver thickness plus the base and sand layers. It’s essential to make adequate space for each layer to ensure proper stability and support for your driveway.Base Preparation: Building Your Foundation
Once you’ve cleared out the soil, it’s time to lay down the groundwork – literally.- Spread a layer of gravel evenly across the excavated area. This layer of gravel serves as the base for your driveway.
- Add a layer of geotextile fabric on top of the gravel. This fabric isn’t just to prevent weed growth; it also helps maintain stability by keeping things in place.
- Afterward, it’s crucial to compact the gravel with a plate compactor.
Sand Bedding: Creating a Smooth Surface
With the base properly prepared, it’s time to spread a layer of sand over the compacted gravel base. Use a screed tool to even out and smooth down the sand layer. This step is essential as it establishes a uniformly smooth surface for the pavers to rest on. The sand bedding provides stability and support while allowing flexibility for adjustments during the installation process.With these foundational elements in place, we’ve now set the stage for laying down your new driveway pavers. Each layer serves a specific purpose, from providing structural integrity to ensuring longevity. Now, let’s carry on with crafting your ideal driveway surface – one step at a time.4. Choosing and Laying Down the Pavers
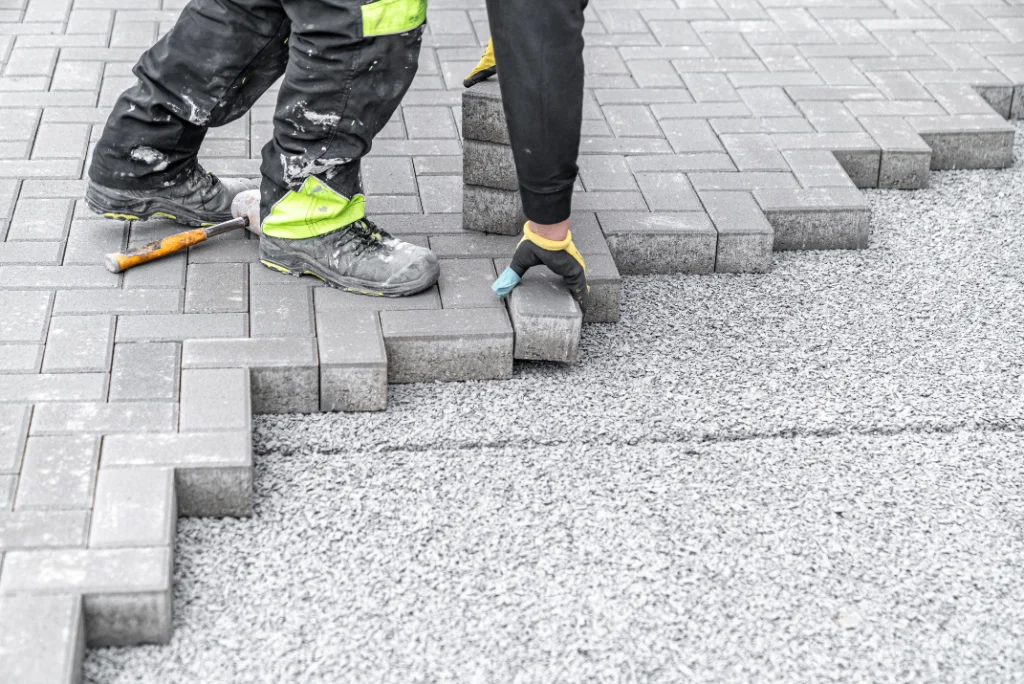
Now, comes the enjoyable part – picking out the pavers! The first thing to consider is the material. Concrete, brick, and natural stone pavers are popular options, each with distinct characteristics to match your design and climate needs.Paver Type
- Concrete: Available in various colors and shapes, durable, low maintenance
- Brick: Classic look, versatile, withstands heavy loads
- Natural Stone: Unique aesthetics, weather-resistant, excellent drainage
5. Edges Preparation and Surface Treatment
Before you start laying the pavers for your driveway, think about their edges. Edge preparation ensures that the pavers remain in place and don’t shift over time.Edging Installation
When it comes to installing edge restraints, there are various options available. You can choose from materials like plastic, metal, or concrete. Each material has its pros and cons:- Plastic edging is flexible, which makes it easier to shape around curves but may not be as durable as metal or concrete.
- Metal edging provides great strength but could rust over time if not coated properly.
- Concrete edging is strong and long-lasting but can be more challenging to install.
Joint Sand Application
Once the main part is installed, it’s time for the finishing touches. After the pavers have been laid, sweep fine jointing sand all over the surface, allowing the grains to settle into the gaps between the pavers. This small step plays a vital role in securing the pavers together.The sand acts as a bonding agent, locking the individual paving stones together so that they don’t wobble or shift when you drive over them. This results in a more stable, cohesive surface that looks pleasing and stands the test of time.Compact and Leveling
It’s essential to ensure that each paver is evenly set within the surface. For this, using a compactor is crucial. The compactor gently vibrates the pavers, settling them into the bedding sand and ensuring they are level with one another. This process also helps to eliminate any air gaps between the sand and pavers, making the entire structure more stable.The importance of compaction cannot be overstated as it ensures that there are no loose areas that could result in uneven surfaces or potential tripping hazards.By focusing on proper edge preparation and surface treatment, you’re setting your driveway up for success, creating a solid, secure foundation.6. Sealing and Curing the Driveway
Once the pavers are in place, applying a high-quality sealant not only adds an extra layer of protection but also makes the paver colors pop. This step is vital as it helps repel water and prevents weed growth between the joints.When applying the sealant, make sure you follow the manufacturer’s instructions carefully. This includes using the right tools for application and ensuring that the weather conditions are suitable for sealing. A well-done sealing job will significantly extend the lifespan of your driveway, saving you both time and money on future repairs.Curing
Once the sealant has been applied, it’s important to allow the driveway to cure properly. During this period, ranging from 24 to 72 hours, depending on the specific product, it’s crucial to avoid any vehicular traffic on the freshly sealed surface. Think of this as letting your driveway rest after getting its protective shield put on. Just like when you get a fresh paint job, you don’t want to risk ruining it before it’s fully set.7. Final Inspection
After curing, take some time to inspect the completed driveway with a critical eye. Look out for any imperfections, uneven surfaces, or maintenance needs that may require attention. It’s essential to ensure that your project meets the desired quality standards before allowing regular use.You might notice small touch-ups that need to be done or realize that certain areas could benefit from minor adjustments. Taking care of these issues early on will help you avoid more extensive repairs in the future.Regular upkeep plays a significant role in maintaining the appearance and functionality of your newly paved driveway. By following through with these steps diligently and thoroughly, you can enjoy your beautifully sealed and cured driveway for years to come without worry.A DIY driveway paver project can be fulfilling, especially if DIY enthusiasts have knowledge and experience in crafting driveways. If you have the time and expertise, and you want to save on costs, then a DIY driveway paver can be for you. For professional installation or assistance with your driveway paving project, feel free to reach out to us at Coastal Driveway Pavers. Call us at (904) 867-4076. Happy paving!Frequently Asked Questions
Can you block pave your own driveway?
Yes, you can block pave your driveway if you have the necessary skills, tools, and patience. Block paving a driveway is a labor-intensive process that involves:- preparing the ground
- laying a sub-base and sand layer
- placing the paving blocks
- and finally, sealing and finishing the surface
Do I need a permit to pave my driveway?
Yes. However, the need for a permit to pave your driveway varies depending on local city or county regulations. Permits ensure the work complies with zoning laws, construction standards, and drainage requirements. It’s crucial to check with your local building department or municipality to understand requirements and avoid fines or the need to redo the work. Coastal Driveway Pavers can assist in these regulations, helping you get permits before starting work.How much does it cost to pave your driveway?
The average cost ranges from $3,000 to $10,000, with specific prices dependent on material choice and project complexity. The cost to pave your driveway varies based on factors such as the driveway’s size, the materials used, and regional labor rates. Coastal Driveway Pavers offers competitive pricing and detailed quotes to ensure transparency and affordability for your paving project.How hard is it to pave your own driveway?
Paving your own driveway is a challenging project that requires knowledge, physical labor, precision, and patience. The difficulty varies with the material and the driveway’s specifics. For those who prefer not to tackle this demanding task, Coastal Driveway Pavers provides professional paving services that guarantee a level surface, proper drainage, and a visually appealing finish. While DIY paving is an option, enlisting professionals can save time and ensure the project’s long-term success.Can I make my own driveway?
Making your own driveway is achievable, especially with more manageable materials like gravel. The process includes planning, obtaining permits, excavating, and laying the surface material. Assessing your skill level and the project’s requirements is vital, but professional help can streamline the process and deliver superior results.Frequently Asked Questions
Yes, you can block pave your driveway if you have the necessary skills, tools, and patience. Block paving a driveway is a labor-intensive process that involves:
- preparing the ground
- laying a sub-base and sand layer
- placing the paving blocks
- and finally, sealing and finishing the surface
While it’s possible for a DIY enthusiast to undertake this project, professional installation is recommended. Improper installation can lead to issues like uneven surfaces, poor drainage, and block displacement over time. For those seeking a hassle-free experience, Coastal Driveway Pavers offers expert installation services to ensure a durable finish.
Yes. However, the need for a permit to pave your driveway varies depending on local city or county regulations. Permits ensure the work complies with zoning laws, construction standards, and drainage requirements. It’s crucial to check with your local building department or municipality to understand requirements and avoid fines or the need to redo the work. Coastal Driveway Pavers can assist in these regulations, helping you get permits before starting work.
The average cost ranges from $3,000 to $10,000, with specific prices dependent on material choice and project complexity. The cost to pave your driveway varies based on factors such as the driveway’s size, the materials used, and regional labor rates. Coastal Driveway Pavers offers competitive pricing and detailed quotes to ensure transparency and affordability for your paving project.
Paving your own driveway is a challenging project that requires knowledge, physical labor, precision, and patience. The difficulty varies with the material and the driveway’s specifics. For those who prefer not to tackle this demanding task, Coastal Driveway Pavers provides professional paving services that guarantee a level surface, proper drainage, and a visually appealing finish. While DIY paving is an option, enlisting professionals can save time and ensure the project’s long-term success.
Making your own driveway is achievable, especially with more manageable materials like gravel. The process includes planning, obtaining permits, excavating, and laying the surface material. Assessing your skill level and the project’s requirements is vital, but professional help can streamline the process and deliver superior results.

Written By: