What Happens Under Your Pavers? Why the Base Matters More Than the Surface
When homeowners shop for a new driveway, they spend 90% of their time choosing the paver — the color, the pattern, the material. That makes sense. The paver is what you see every day. But the part that determines whether your driveway lasts 5 years or 50 years is the part you’ll never see again once it’s built: the base.
The base is the engineered foundation beneath the pavers. It handles load distribution, drainage, freeze-thaw cycles, soil movement, and the daily weight of vehicles driving across the surface. Get it right and the pavers stay level and locked for decades. Get it wrong and the driveway sinks, shifts, and fails — no matter how expensive the pavers on top are.
The Anatomy of a Proper Paver Base
A properly built paver driveway in Jacksonville has four distinct layers, each serving a specific purpose:
Layer 1: Excavated and Compacted Subsoil
The native soil is excavated to the proper depth — typically 10–14 inches below the finished grade for driveways — and then compacted with a plate compactor or roller. This removes air pockets and creates a stable platform for everything above. In Jacksonville’s sandy soil, compaction is critical because sand shifts easily under load if it’s not properly densified.
Layer 2: Aggregate Base (Limerock or Crushed Stone)
A 6–8 inch layer of limerock or crushed aggregate is installed in lifts (2–3 inch layers), with each lift compacted individually before the next is added. This layer is the structural backbone of the driveway. It distributes the weight of vehicles across a wide area, prevents point loading that causes sinking, and provides drainage so water doesn’t pool beneath the pavers.
The aggregate locks together when compacted, creating a rigid, load-bearing surface that doesn’t move under traffic. This is why limerock and crushed stone are used instead of round gravel — angular pieces interlock; round pieces roll and shift.
Layer 3: Bedding Sand
A 1-inch layer of coarse, washed concrete sand is screeded (leveled) across the top of the compacted base. This layer serves as the setting bed for the pavers — filling small imperfections in the base surface and allowing the pavers to be set to a precise, uniform grade. The sand also allows minor flex when the pavers are compacted into final position.
Layer 4: Pavers + Polymeric Sand Joints
The pavers are set on the bedding sand in the chosen pattern, then compacted with a plate compactor that vibrates them down into the sand bed, locking them into place. Polymeric sand is swept into the joints and activated with water, creating a semi-rigid bond that resists washout, weed growth, and insect intrusion.
What Happens When Contractors Skip Steps
| Step Skipped | What Happens | When You’ll Notice |
|---|---|---|
| Insufficient excavation depth | Base too thin, can’t distribute vehicle weight | 6–18 months — tire tracks, settling |
| No compaction between lifts | Base settles unevenly under load | 3–12 months — dips, low spots |
| Round gravel instead of angular aggregate | Base shifts laterally, no interlock | 6–24 months — pavers spreading apart |
| Bedding sand too thick (over 1.5″) | Pavers sink into sand under weight | 1–6 months — ruts in wheel paths |
| No edge restraints | Perimeter pavers creep outward | 6–12 months — widening gaps at edges |
| Skipped plate compaction of pavers | Pavers not seated into sand, shift under traffic | Immediately — loose, rocking pavers |
Every one of these shortcuts saves the contractor time and material cost. Every one of them causes your driveway to fail prematurely. And every one of them is invisible on the day the project is “finished.” You only discover the shortcut months or years later when the driveway starts moving.
Why Florida’s Soil Makes the Base Even More Critical
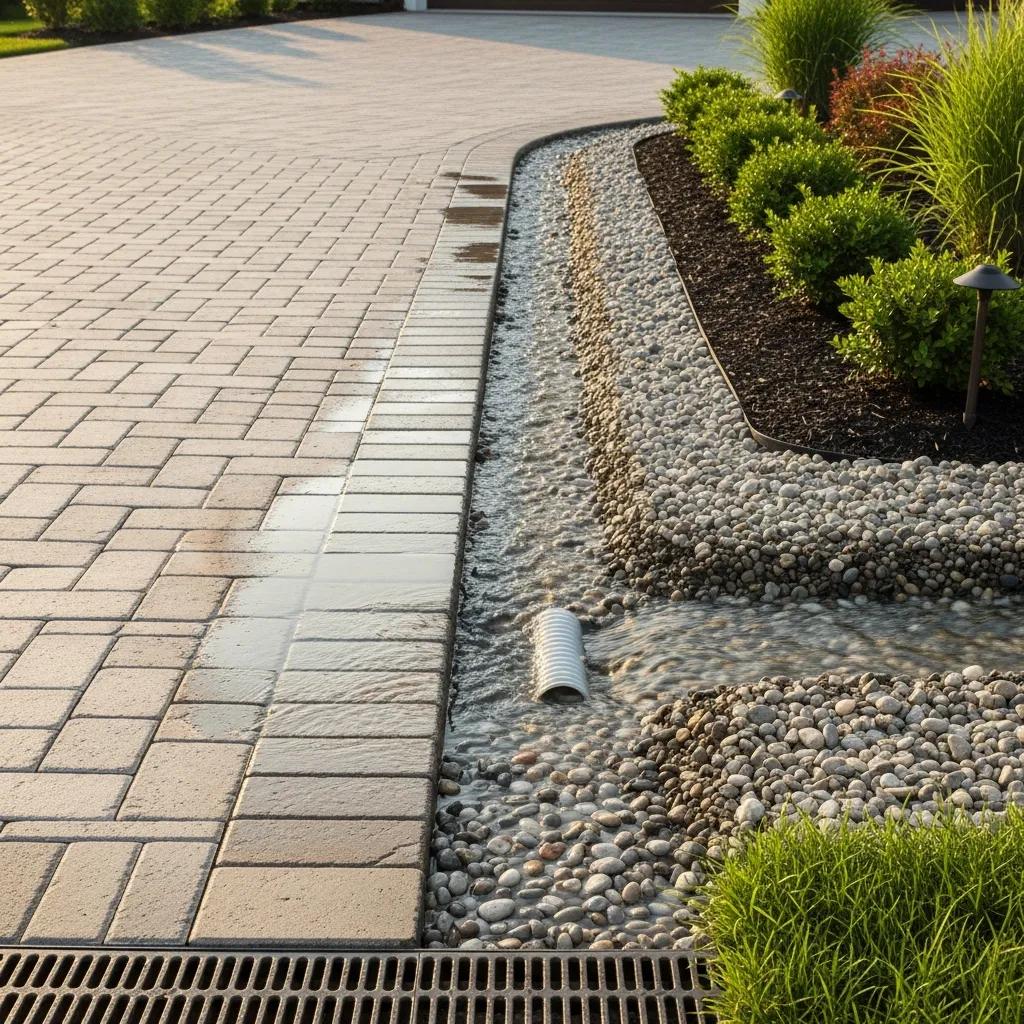
Jacksonville sits on sandy soil that’s prone to erosion and poor at retaining compaction when saturated. During heavy rains — which happen frequently from June through September — water percolates through the soil and can wash away fine particles beneath the base if drainage isn’t properly managed.
A properly built base with angular aggregate and correct grading handles this by channeling water away from the base and allowing it to drain through the aggregate without displacing material. An improperly built base traps water, erodes from within, and creates voids that cause the pavers above to sink.
This is why base preparation in Florida takes longer and costs more than in drier climates with clay or rocky subsoil. It’s also why choosing a contractor who understands local soil conditions — not just paver installation — is critical.
How to Know If Your Base Was Done Right
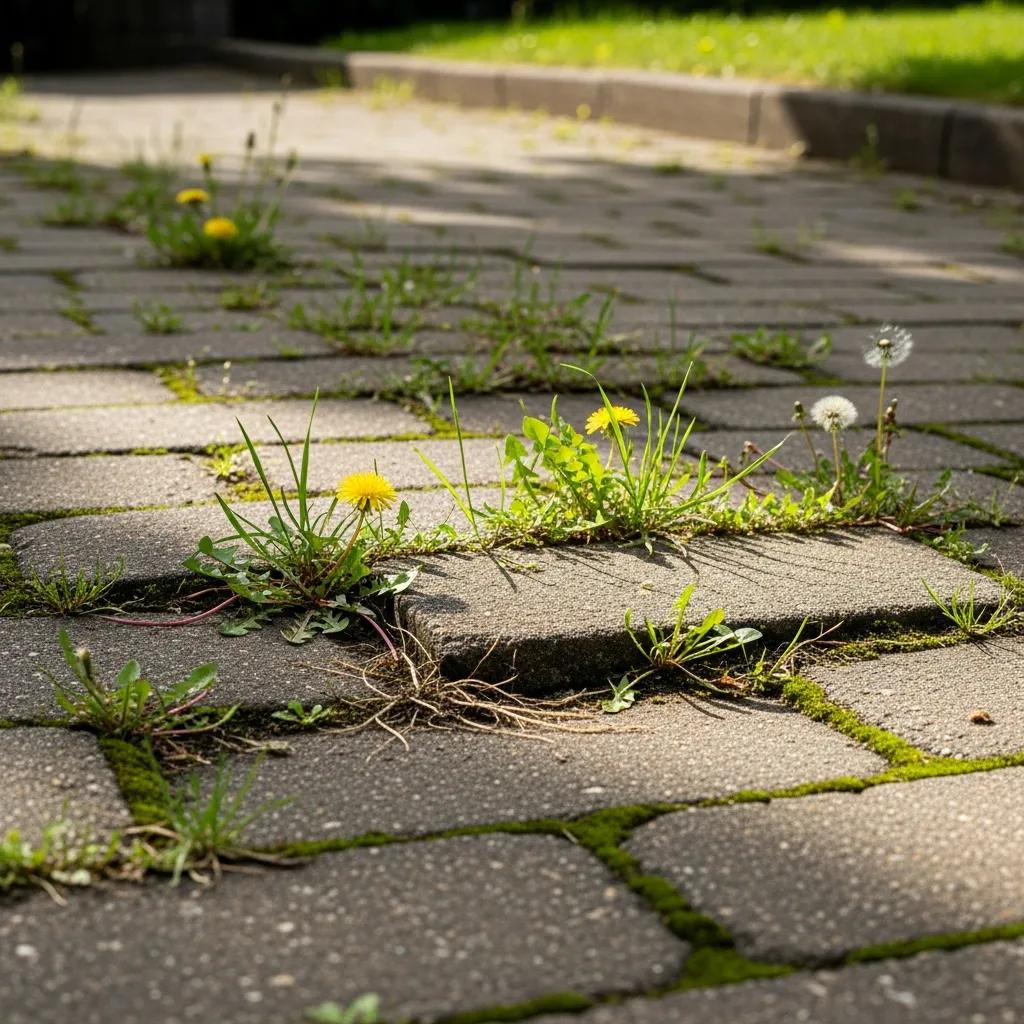
You can’t inspect the base after the pavers are installed. But you can watch for warning signs that the base is failing: pavers sinking in wheel path areas, individual pavers rocking when stepped on, visible settling or dipping after rain, widening joint gaps at edges or along the driveway’s border, and water pooling on the surface where it didn’t before.
If you’re seeing any of these symptoms within the first 2–3 years of a new paver driveway, the base was likely inadequate. The fix often requires pulling up pavers, rebuilding the base properly, and reinstalling — essentially redoing the job correctly.
Build It Right From the Start
At Coastal Driveway Pavers, base preparation is the phase we invest the most time in — because we know it determines everything that follows. Every driveway we install includes full excavation to the proper depth for the load and soil conditions, compacted limerock base installed in engineered lifts, precise bedding sand screeding, and a lifetime warranty on the base and workmanship.
Call (904) 867-4076 for a free estimate. We’ll show you exactly what goes into a base that lasts — not just pavers that look good on day one.