Building a patio in Northeast Florida is not the same job it is in Ohio or Georgia, and a good paver patio installation in Jacksonville has to answer to three things at once: sandy, fast-draining soil, a subtropical rain pattern that dumps inches in an afternoon, and sun intense enough to bake surface temperatures well past what a bare foot wants to touch. Get the base and the drainage right and a paver patio here will sit flat and tight for decades. Skip a step and Florida’s weather finds it fast.
This guide walks through the whole process the way we approach it on jobs from Riverside to Nocatee: choosing your material, planning the layout, excavating and compacting a proper base for our soils, setting the pavers, locking the edges, and sealing. Whether you plan to hire a crew or want to understand exactly what a good crew should be doing, you’ll leave knowing how to install a paver patio that survives a Duval County summer.
We build driveways and patios across the First Coast, so the same base-building discipline that keeps a driveway from settling is what we bring to every patio. If you’d rather talk to a person, reach out any time.
Quick answer: A lasting paver patio in Jacksonville comes down to a deep, well-compacted crushed-stone base over geotextile fabric, a screeded sand bed, tight edge restraints, and a slope that carries our heavy rain away from the house.
- Excavate 7–9 inches and build a 4–6 inch compacted crushed-stone base — sandy soil needs the depth and the fabric.
- Slope the surface at least 1/4 inch per foot away from structures so afternoon storms drain instead of pooling.
- Concrete pavers, travertine, and clay brick each behave differently under Florida sun — match the material to the use.
- Polymeric joint sand and edge restraints are what keep the field from spreading and weeds from taking over.
Why paver patio installation is different in Northeast Florida
Most of the Jacksonville metro sits on sandy, well-draining soil — great news in that water moves through it quickly, tricky news in that loose sand shifts under load and washes out at edges if it isn’t contained. Closer to the river, marsh, and coast, you’ll also hit pockets of organic muck and a seasonally high water table. All of that changes how a patio base has to be built.
On top of the soil, the climate does real work on hardscape. A few local factors that shape every paver patio installation here:
- Rain intensity. Jacksonville averages roughly 50+ inches a year, most of it in short, heavy summer storms. Drainage slope isn’t optional — it’s the difference between a dry patio and a birdbath.
- Sun and heat. Surface color matters. Dark pavers in full sun get hot; lighter travertine and buff-toned concrete stay far more comfortable underfoot in July.
- Sandy subgrade. Loose sand needs geotextile separation and a proper stone base, or the fines migrate and the surface ripples over time.
- Root pressure. Live oaks and laurel oaks are everywhere in older neighborhoods like Avondale and San Marco — plan the layout around root zones so you’re not fighting heave later.
This is the same soil behavior that causes trouble underfoot elsewhere on a property. If you’ve ever seen a paver driveway start to sink here in Jacksonville, the root cause is almost always a base that was too shallow or not compacted for our sand. A patio is no different — the base is everything.
Choosing your paver patio material: concrete, travertine, or clay brick
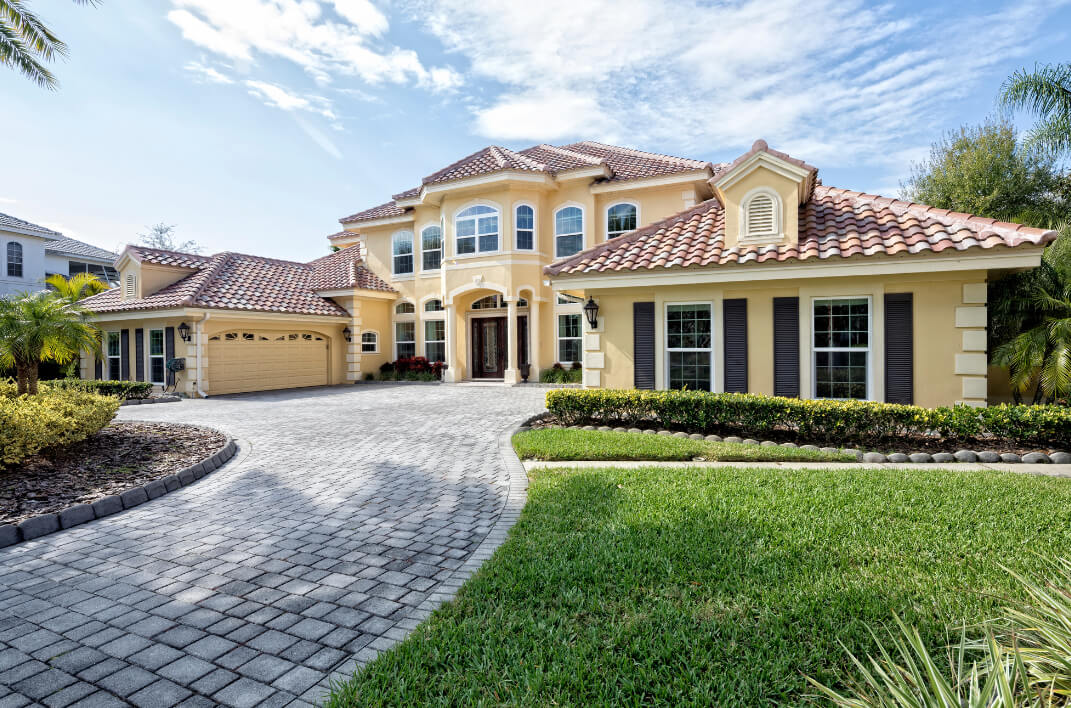
The three materials we install most for patios each have a personality. Concrete pavers are the workhorse — dimensionally consistent, huge range of shapes and colors, and easy to source and replace. Travertine is a natural stone that stays remarkably cool in the sun and reads as high-end, popular around pools in Ponte Vedra and Nocatee. Clay brick brings the classic Old-Florida look that fits the historic districts, and its color is baked all the way through so it never fades.
Here’s how they compare for a Northeast Florida patio:
| Material | Heat underfoot | Durability in FL climate | Look & best fit | Maintenance |
|---|---|---|---|---|
| Concrete paver | Moderate (color-dependent) | Very high; freeze-thaw is a non-issue here | Most versatile — modern to traditional; great all-purpose patio | Seal every few years; individual units swap out easily |
| Travertine | Coolest of the three | High; naturally slip-resistant when honed | Upscale, natural stone; ideal for pool decks and shaded lounging | Seal to resist staining; softer stone, handle with care |
| Clay brick | Warm but color-stable | Very high; color won’t fade in UV | Classic, historic-district charm (Riverside, Springfield) | Low; may need occasional weed and moss control in shade |
Is travertine really cooler than concrete in the Florida sun?
Yes, noticeably. Travertine is a porous natural stone with a lighter, reflective surface, so it absorbs and holds less heat than a dark-dyed concrete paver. On a full-sun pool deck in July that difference is easy to feel through bare feet, which is why so many pool patios around Ponte Vedra and St. Johns County use it. If you love the concrete-paver format but want cooler footing, choose a light buff or gray tone rather than charcoal, and it will behave much better in direct sun.
Planning layout, size, and shape: paver patio ideas that work here
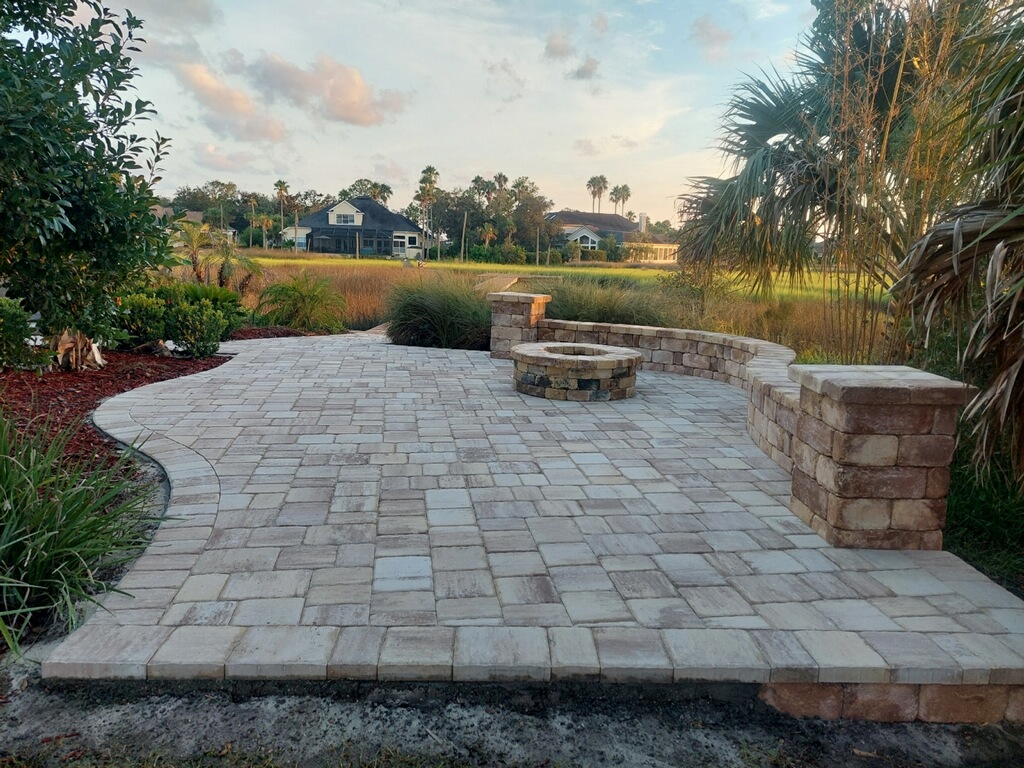
Before anyone touches a shovel, the layout gets planned on paper. Size the patio to how you’ll actually use it: a dining set needs roughly a 12-by-12-foot open area so chairs can slide back without hitting grass, while a lounge or fire-feature zone reads best around 14-by-16 feet or larger. Odd, cramped dimensions are the most common regret, so measure your furniture first.
A few paver patio ideas and planning notes tuned to Jacksonville yards:
- Orient for shade. West-facing patios take brutal late-afternoon sun. If you can, tuck the seating zone toward morning-sun or oak-shaded exposure, or plan for a pergola.
- Plan the pattern for the space. Herringbone locks tightest and suits high-traffic and vehicle-adjacent areas; running bond feels calm and modern; a soldier-course border frames any field cleanly.
- Mind the drainage direction. Sketch which way water will run before you set a slope — always away from the house and the neighbor’s line.
- Leave a soldier or sailor border. A perimeter course gives you a clean line to set edge restraints against and makes cuts look intentional.
- Account for transitions. Steps, a landing at the door, and a path back to the driveway should all be drawn in now, not improvised later.
This is also the right moment to confirm setbacks and any HOA architectural rules — Nocatee, eTown, and many St. Johns communities have design guidelines, and it’s far easier to adjust a drawing than a finished patio.
Building the base: the part of paver patio installation that lasts
If there is one section to read twice, it’s this one. The base is where a paver patio installation is won or lost, and in our sandy soil it’s the step people most often shortcut. A patio surface can only be as flat and stable as the compacted stone underneath it.
Here’s the base sequence we follow on First Coast patios:
- Excavate to depth. Dig down 7–9 inches for a foot-traffic patio — enough for 4–6 inches of compacted base plus about an inch of bedding sand plus the paver thickness. Remove any organic muck; it never compacts and will settle.
- Lay geotextile fabric. A woven geotextile over the subgrade separates your clean stone from the underlying sand so the two don’t mix. In our soils this separation layer is what stops long-term rutting and rippling.
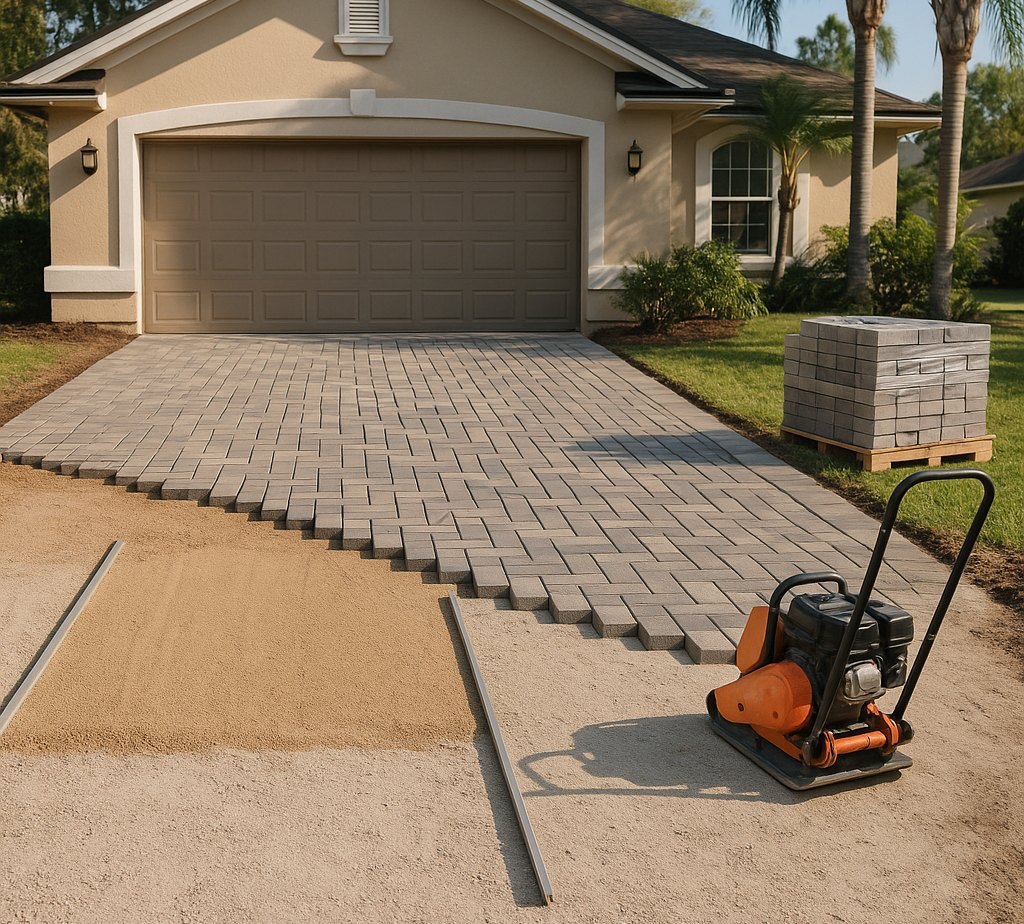
- Add crushed stone in lifts. Use an angular crushed aggregate (not rounded pea gravel, which won’t lock). Place it in 2–3 inch lifts and compact each lift with a plate compactor — compacting one thick layer leaves soft zones underneath.
- Build the slope into the base. Establish your drainage fall now, at the base stage, so the finished pavers naturally shed water. Chasing slope only at the surface never works.
- Check it flat and firm. A properly compacted base barely shows a footprint. If your boot sinks in, it’s not ready for sand.
Why does crushed-stone depth matter more in Jacksonville’s sandy soil?
Because loose sand offers very little lateral support. A compacted angular-stone base spreads foot and furniture loads across a wide, stable platform and bridges over the soft, shifting sand beneath it. Skimp on depth or use rounded gravel that can’t interlock, and the load concentrates, the sand migrates, and you get low spots and rocking pavers within a season or two. The geotextile fabric is the other half of the equation — it keeps the sand and the stone from blending into one unstable mush. Depth plus separation is what buys you a patio that stays flat.
Sand setting bed and laying patterns: how to install a paver patio surface
With the base compacted and sloped, the next step in how to install a paver patio is the bedding sand. Lay one inch of coarse concrete sand (not fine masonry sand), set two screed rails — often lengths of pipe — to the right height, and pull a straight screed board across to level the sand precisely. That screeded surface should not be walked on. Once it’s smooth, you begin laying pavers off the edge and never disturb the bed you’ve screeded.
Setting the field:
- Start from a straight edge — a house wall or a snapped string line — and work outward so your pattern stays true.
- Keep consistent joints. Small, even gaps (about 1/8 inch) let joint sand lock the units together. Butting pavers tight actually makes chipping more likely.
- Choose the pattern for the load. Herringbone (45° or 90°) resists shifting best; running bond and basketweave read more traditional for a pure patio.
- Make border and obstacle cuts with a masonry saw for clean, tight fits around AC pads, columns, and step landings.
- Seat the field with a plate compactor over the pavers (a protective mat prevents scuffing) so each unit beds evenly into the sand.
Edge restraints, slope, and drainage
A paver patio has no mortar holding the field together — the perimeter does that job. Without a solid edge restraint, the outermost pavers creep outward, joints open, and the whole field slowly spreads. On a patio we set rigid paver edging (spiked into the compacted base) or a concrete haunch (bond beam) around the perimeter, hidden just below finished grade and backfilled with soil or sod.
Drainage is the other half of long-term performance in our climate:
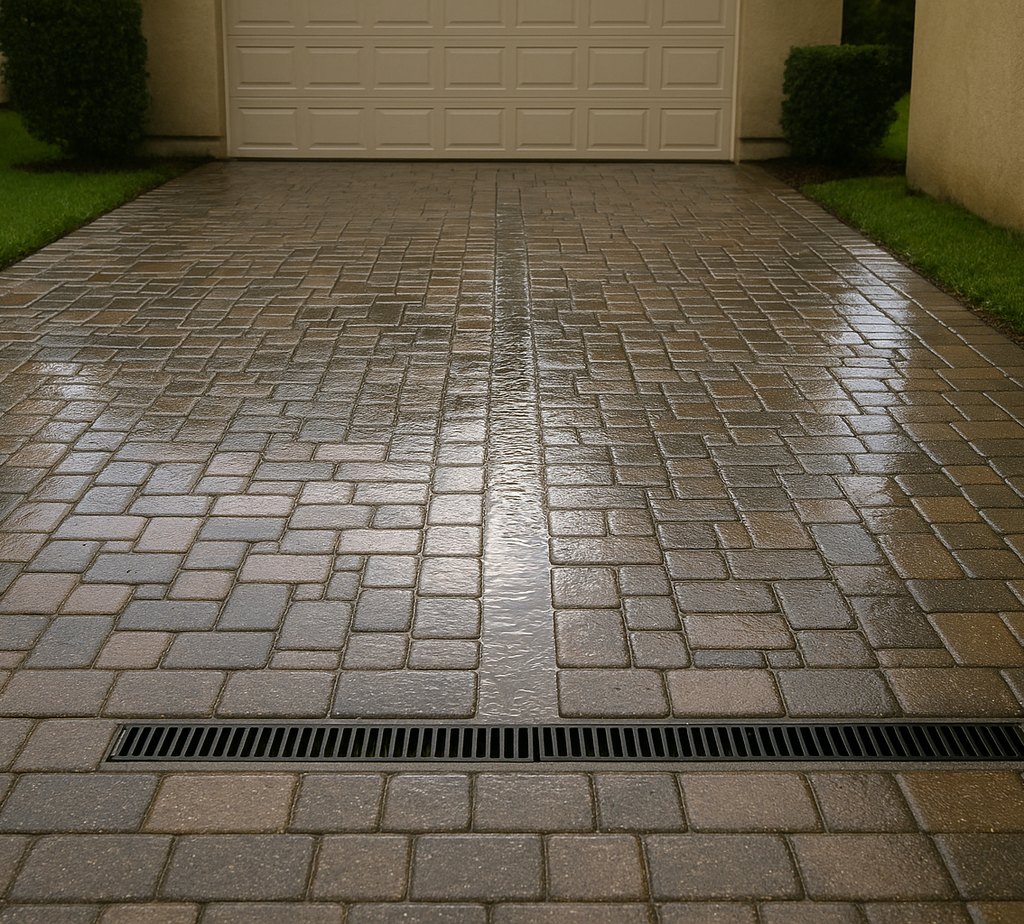
- Slope at least 1/4 inch per foot (about 2%) away from the house, pool, and any structure. On a 16-foot-deep patio that’s about 4 inches of total fall — build it into the base.
- Never slope toward the foundation or toward a neighbor’s property line; both invite standing water and disputes.
- Plan where the water goes. Direct runoff to a lawn area, a swale, or a drain — not against the slab or into a low corner that will pond.
- Consider permeable pavers in flat, low-lying lots near the marsh or river where surface water lingers; the open-graded base lets storms percolate straight through.
How much slope does a Jacksonville patio really need for our rain?
A minimum of 1/4 inch of fall per foot — roughly 2% — measured away from the house. Given how hard our summer storms come down, we often build closer to that full 1/4 inch rather than the bare minimum, especially on larger or partially shaded patios where water evaporates slowly. The slope has to be established in the compacted base and carried through the bedding sand; you can’t fix inadequate slope by tilting the top pavers. And the fall must always run away from structures and toward a spot that can actually take the water — a lawn, swale, or drain.
Polymeric joint sand and sealing
Joint sand is what turns a field of loose pavers into an interlocked surface. We use polymeric jointing sand — sand blended with a binder that hardens when activated with a light mist of water. Swept into the joints and compacted, it locks the pavers together, resists washout in heavy rain, and dramatically cuts down the weeds and ants that plain sand invites.
A clean finish and long life come from a few details:
- Sweep polymeric sand fully into the joints and vibrate it down with the plate compactor so joints fill from the bottom up.
- Clear every grain off the paver faces before activating — leftover sand can haze or stain the surface once wet.
- Mist, don’t flood. Over-watering polymeric sand ruins the cure; follow the light, staged watering the product calls for.
- Seal when appropriate. A quality sealer helps concrete pavers hold color, protects travertine from staining, and makes routine cleaning easier. Let a new installation weather a few weeks first, and reseal every few years.
Sealing is optional on some materials and strongly recommended on others — travertine in particular benefits from it around pools where sunscreen and organics can stain. We’ll advise based on your material and exposure.
Permits and getting it right in NE Florida
A ground-level patio in a private backyard often doesn’t require a building permit, but the answer genuinely depends on your jurisdiction and the details of the project. Structures, footings, work in a drainage easement, or anything touching the public right-of-way change the picture. Duval County, Clay, Nassau, and St. Johns each run their own rules, and HOA architectural review is separate from and on top of any county requirement.
A few things worth confirming before you build:
- Easements and setbacks. Utility and drainage easements at the rear or side of a lot can restrict where you’re allowed to build.
- Right-of-way work. Anything near the street or apron is a different animal. If your project ties into the front, our guide to driveway apron permits and right-of-way rules in Jacksonville explains what the city expects.
- HOA design review. Master-planned communities like Nocatee and eTown often require material and color approval before you start.
- Tree protection. Jacksonville protects certain trees; building over major root zones can require review and is a bad idea structurally anyway.
We handle this kind of due diligence on every job so nothing gets torn out later. You can always learn more about how we work or bring us your questions directly.
Frequently Asked Questions
How long does a paver patio installation take in Jacksonville?
Most residential paver patios take somewhere between three days and about a week from excavation to final joint sand, depending on size, access, and pattern complexity. The base work — excavating, laying fabric, and compacting stone in lifts — takes the largest share of the schedule because it can’t be rushed in our sandy soil. Weather is the wild card: summer afternoon storms and saturated ground can add a day here and there, so we build a little slack into the timeline during the wet season.
What is the best paver material for a Florida pool deck?
Travertine is the most popular choice for pool decks across Ponte Vedra and St. Johns County because it stays notably cooler underfoot in full sun and is naturally slip-resistant when honed. Light-colored concrete pavers are an excellent alternative — very durable, easy to replace individually, and cooler than dark tones. The key for any poolside surface is a light color, a slip-resistant texture, and proper sealing to resist staining from sunscreen and pool chemicals.
Will a paver patio sink or settle in sandy Jacksonville soil?
Not if the base is built correctly. Settling almost always traces back to a base that was too shallow, wasn’t compacted in lifts, or was built without geotextile fabric to separate the stone from the underlying sand. A properly excavated 4–6 inch compacted crushed-stone base over fabric spreads loads and stays stable for decades. The same principle applies to driveways here — when a paver surface sinks in Northeast Florida, the base is nearly always the reason.
Do I need a permit to build a paver patio in Jacksonville?
A simple ground-level backyard patio frequently does not require a building permit, but it depends on your jurisdiction and the specifics — footings, structures, drainage easements, or right-of-way work can trigger one. Duval, Clay, Nassau, and St. Johns County each set their own rules, and HOA architectural approval is a separate requirement layered on top. We recommend confirming with your local building department and HOA before construction, and we help clients sort this out on every project.
How do I keep weeds from growing between my patio pavers?
The biggest defense is polymeric joint sand, which hardens in the joints and blocks the gaps where weed seeds and ants take hold. Combined with a woven geotextile fabric under the base, it dramatically reduces growth from below and above. From there, routine maintenance is easy: sweep regularly, rinse the surface, and spot-treat any stray growth in shaded joints. Resealing every few years and topping up joint sand as needed keeps the surface tight and low-maintenance for the long haul.